Friday, 9 November 2018

Red Velvet Cupcakes


Hello!
I know it has been a very long time since the last post but now that blog finally has YouTube channel, the posts should be more frequent. Today’s recipe is one of my favourites, it’s the Red Velvet Cupcakes, yeey! As I mentioned in my very first post, Red Velvet is one of the world’s most popular flavours; it’s a bit chocolaty, very vanillary, slightly salty but also sweet: it’s a bit of everything and it's incredibly delicious!  So without further ado, let’s get cooking!


You'll need: 

For the cupcakes: (10-12 cupcakes)
  • 100g sugar
  • 100g butter (at room temperature)
  • 2 eggs
  • 1 tsp vanilla extract 
  • 140g flour
  • 10g Cocoa powder
  • 1 tsp baking powder
  • ¼ tsp baking soda
  • A pinch of salt 
  • 45ml Buttermilk
  • 1t tsp White Vinegar
  • 2 tsp Red food coloring


For the frosting:
  • 100g Chantilly cream powder
  • 150ml milk (always reduce the amount of milk described on the box) 
  • 120g cream cheese 


Let's start:


Step 1: Bake the cupcakes:
  1. Preheat your oven on 160°C and put the cupcake liners on a baking tray.
  2. Sift in the dry ingredients together: flour, cocoa powder, baking powder, baking soda and salt, and whisk to combine.
  3. In a bowl of an electric mixer fitted with the paddle attachment, combine the butter and sugar on until it gets light and creamy and then add the eggs one at a time mixing well in between each. Then add the vanilla extract and mix again.
  4. In a small cup, combine the buttermilk, vinegar and the food colouring and then add them to the batter. Mix again on high speed for few seconds.
  5. Fill in the cupcake liners with batter to the 2/3 and bake them for about 10-15 min until when a toothpick is inserted into the centre of a cupcake, it comes out dry.
  6. Let them cool completely before frosting them.


Step 2: Prepare the frosting:

  • Pour the milk on the Chantilly cream powder and whipped it on high speed until it gets firm and fluffy.  Then, add the cream cheese and mix it again until it’s well incorporated. 
  • Place the frosting in the fridge until you're ready to use it.


Step 3: The fun part: decoration:

  • Fill a piping bag, fitted with a star nozzle, with the frosting and pipe it on the cupcakes.
  •  Take one of the cupcakes (you’re least favourite or the smallest) and crumble it then use it to decorate the cupcakes, or you could just skip this part.


Thank you for stopping by and I really hope you'll give this recipe a try!

Bon Appétit


Sunday, 14 January 2018

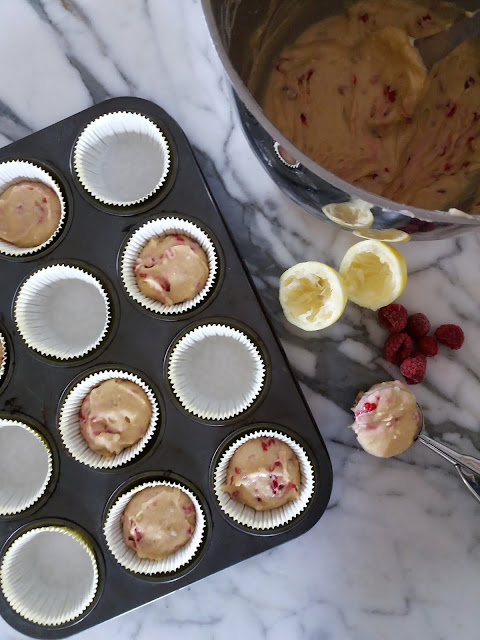
Lemon Raspberry Cupcakes


Hey there!! I'm finally back and if you are looking for sweetness with a taste of sour magic then Lemon Raspberry Cupcakes are the thing for you! The mix of lemon and berries make it so moist and full of flavour that would blow your mind away, so let’s get cooking!


You'll need: 

For the cupcakes: (10-12 cupcakes)
  • 130g flour
  • 90g sugar
  • 100g butter (at room temperature)
  • 1 tsp baking powder
  • A pinch of salt 
  • Lemon zest
  • 2 eggs
  • ½  tsp vanilla extract 
  • 2 tbsp milk
  • 2 tbsp to taste fresh lemon juice
  • Frozen  raspberries


For the frosting:
  • 75g Chantilly cream powder
  • 150ml milk (always reduce the amount of milk described on the box) 
  • Lemon juice and zest 


Let's start:


Step 1: Bake the cupcakes:
  1. Preheat your oven on 180°C and put the cupcake liners on a baking tray.
  2. In a bowl of an electric mixer fitted with the paddle attachment, sift in together the dry ingredients: flour, baking powder and salt. Then add the butter, sugar, lemon zest and the eggs. Mix everything on a medium speed until well combined. 
  3. In a small cup, combine the milk, vanilla extract and the lemon juice and then add them to the batter. Mix again on high speed for few seconds.
  4. Break the frozen raspberries, coat them with some flour then add it to the batter and mix until well incorporated. 
  5. Fill in the cupcake liners with batter to the half and bake them for about 15-20 min until when a toothpick is inserted into the centre of a cupcake, it comes out dry.
  6. Let them cool completely before frosting them.


Step 2: Prepare the frosting:

  • Pour the milk on the Chantilly cream powder and whipped it on high speed until it gets firm and fluffy.  Then, add the lemon zest and juice and mix it again until it’s well incorporated. 
  • Place the frosting in the fridge until you're ready to use it.


Step 3: The fun part: decoration:


  • Fill a piping bag, fitted with a star nozzle, with the frosting and pipe it on the cupcakes. You can add some raspberries and/or lemon on the top, it’s up to you! 


Thank you for stopping by and I really hope you'll give this recipe a try!

Bon Appétit


Monday, 10 July 2017

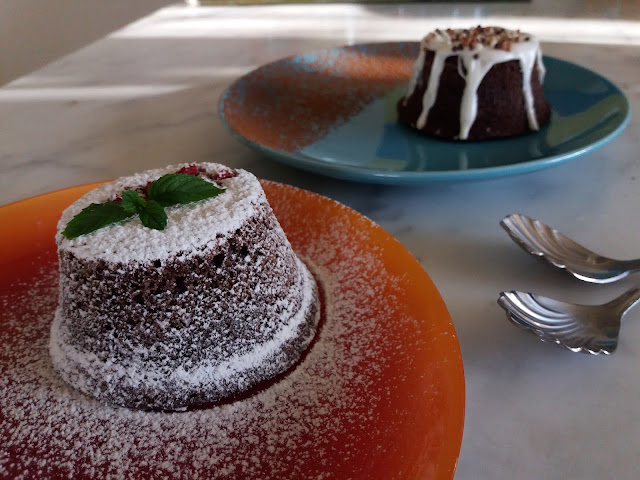
Chcolate Molten Lava Cake


Hey there! Today we’re going to make Lava Cake also known as Molten Chocolate Cake or Chocolate Fondant, whatever the name you choose, the deliciousness is as great. Basically, it’s a slightly under-cooked chocolate cake; the outside is dense while the inside has a gooey consistency and when you break it open the chocolatey lava melts out, hence the name. 
So let’s get cooking! 


You’ll need:
(for 6 persons)
  • 200g dark chocolate
  • 100g butter (at room temperature) 
  • 100g sugar
  • 100g flour
  • 25g cocoa powder
  • 3 eggs
  • some extra butter and sugar for the ramequins


Let’s start:

  1. Preheat the oven to 180°C and prepare your ramequins (or aluminium muffin tins) by greasing them with butter and dusting them with sugar.
  2. Melt the chocolate using the microwave or over a bain-marie and let it aside.
  3. Using a whisk mix the butter and sugar until well combined. Then, add the eggs one at a time mixing well in between each.
  4. Sift in the flour and cocoa powder and mix well. Then, add the melted chocolate and stir again until well combined.
  5. Pour the mixture into the ramequins and bake them for 12 minutes, until the edges are firm and the centre is still soft. 
  6. Finally, let the cakes cool for few seconds then run a knife around the edges of the cakes to loosen them and invert onto your serving plates.
    They’re best served hot with a scoop of your favourite ice cream. You can get creative with decoration or just keep it simple.


Thank you for stopping by and I really hope you'll give this recipe a try!

Bon Appétit

Sunday, 9 April 2017

No-Bake Snickers Pie


Helloo! Today we’re going to make a Snickers pie. It’s basically, a chocolate crust with a peanut and caramel filling topped with whipped cream more chocolate & caramel and, of course, Snickers! It’s so easy to make and you don’t even need to use the oven.  So let’s get cooking!


You’ll need:

For the crust:
  • 200g chocolate biscuit 
  • 75g butter

For the filling:
  • 200g roasted peanuts 
  • 1 tbsp honey
  • 50g butter (at room temperature) 
  • 300ml sour cream
  • 240g cream cheese
  • 60g powdered sugar 
  • 1 tsp vanilla extract 
  • 3 tbsp (to taste) Caramel sauce

For the decoration:


Let’s start:

Step 1: Making the crust:
  • In a food processor, pulse the biscuits until they turn into fine crumbs then melt the butter and add it to the crumbs and mix them well. Press the mixture into the pan (Ø 20cm) up to the sides, make sure it’s evenly distributed (( I use the back of a spoon at first and at the end I press it more with the bottom of a glass)) and then put it in the freezer until you prepare the filling.


Step 2: Preparing the Filling:
  1. In a food processor, put the peanuts, butter and honey and mix them until just combined (( the peanuts don’t have to be completely crushed)).
  2. In a large bowl, whip the sour cream with the vanilla extract and caramel. Then whip the cream cheese and sugar in a different one.
  3. Finally, add the cream cheese and crushed peanuts and to the sour cream and mix until well combined.


Step 3: Assembling:
  • Pour the filling into the crust and put it back into the fridge for few hours or overnight.


Step 4: Decorating:
  • Spared some whipped cream on the top of the pie, then drizzle some chocolate and caramel, finally top it with some crushed snickers and voilà your pie is made! Put it back in the fridge until ready to serve.


Thank you for stopping by and I really hope you'll give this recipe a try!

Bon Appétit

Wednesday, 1 March 2017

Salted Caramel


Hi! When I shared the cheesecake recipe with you, I promised to give you the salted caramel’s recipe very soon. It has been a while already, and I’m so sorry for taking so long. But here it is today and I hope you like it. So let’s get cooking!


You’ll need:
  • 150g sugar
  • 10ml water
  • 50g butter at room temperature 
  • pinch of salt
  • 150ml sour cream at room temperature
    (or you could just use salted butter instead)


Let’s start:
  1. In a saucepan, put the sugar and water and place it over medium heat, stir it few times using a wooden spoon to help the sugar to melt better.  The sugar will probably crystallize, don’t worry it will melt eventually.
  2. Once the sugar has completely melted and turned into thick amber colored sauce, take it off heat and add the butter and salt. You have to be careful because the caramel will bubble up when the butter is added.
  3. Put it back on the stove and stir until the butter is completely melted, it should take a minute or two.
  4. Take it off heat again and add the sour cream, you have to be careful here also because it will bubble up again. Then place it back on the heat, and stir until the cream is well incorporated.
  5. Allow the sauce to boil for a minute, then turn off the heat and let it cool completely.
  6. Finally, transfer it into a jar and store it up to two weeks in the fridge.


You could use salted caramel for loads of things: 


On the top of  a cheesecake:


or drizzle it on pancakes:


or cupcakes:


& with frappuccinos:


Thank you for stopping by and I really hope you'll give this recipe a try!


Bon Appétit


Sunday, 5 February 2017

Cinnamon Rolls


Hey guys! Today we're making cinnamon rolls. They're so cinnamony, very delicous and also a perfect treat for anytime of the day. So let's get cooking!


You’ll need:

For the dough:
  • 500g flour
  • 60g sugar 
  • 15g instant yeast
  • 50g butter
  • 100ml milk
  • 2 eggs
  • a pinch of salt

For the filling:
  • 120g brown sugar
  • 80g butter (at room temperature)
  • 1 tbsp cinnamon


For the cream cheese topping: (optional)
  • 110g cream cheese
  • 3 tbsp icing sugar
  • 45ml milk


Let’s start:

Step 1: Make the dough:
  1. Warm the milk, melt the butter and mix them together.
  2. In a small ball, crack the eggs, add a bit of the previous mix and whisk to combine.
  3. In a bowl of an electric mixer fitted with the dough hook, put the flour, sugar, yeast and salt together. Turn it on a medium speed and gradually pour the milk and butter while mixing. Then, pour the eggs the same way.
  4. Keep mixing until the dough isn’t sticky anymore and forms a loose ball. 
  5. Cover the ball with plastic wrap and keep it in a warm place to rise for at least 2 hours or until it doubles the volume.


Step 2: Prepare the filling:
  • In a bowl, mix the butter, sugar and cinnamon until it reaches a spreadable consistency (you can mix it using a spatula or a hand mixer).


Step 3: Assembling: 
  1. Now that your dough has risen, roll it out, on lightly floured surface, into a 30x40cm rectangle.
  2. Spread the cinnamon on the whole surface.
  3. Starting at one end, tightly roll up the dough.
  4. Using a sharp knife, cut the dough into 3cm sections and set them in a baking try lined with parchment paper (keep them parted a bit). 
  5. Cover the try with plastic wrap and a kitchen towel, and put it in a warm place to let the dough rise again, for at least 30min.


Step 4: The Baking:
  • Preheat your oven to 180°C while waiting for the rolls to rise.
  • Bake them for about 20min or until golden brown.


Step 5: Serving:
  • While the rolls are baking, mix the cream cheese, sugar and milk together until it’s well-combined with a runny constancy.
  • Let the rolls cool a little bit, then drizzle some of the cream cheese on the top and serve them immediately. 


Thank you for stopping by and I really hope you'll give this recipe a try!


Bon Appétit


Wednesday, 18 January 2017

Rainbow Cake


Hey there! It has been a long time! But I’m back and I have a colorful recipe to share with you. Today, we’re making Rainbow Cake. It’s so bright and fun to make. I’ve really enjoyed baking it so I hope you like it. So let’s get cooking!


You’ll need: 

- For each cake:
  • 75g flour
  • 1tbsp corn starch
  • 1 tsp baking powder
  • 75g sugar
  • 3 eggs
  • 1 tsp vanilla extract
  • Food coloring: purple, blue, green, yellow, orange, red (if you’re using powdered colors, use some milk to dissolve them first)

    (you’ll need 6 of these measures)


- For the frosting:
  • 300g Chantilly cream (dream whip kind)
  • 600ml cold milk (I reduced the amount of milk mentioned on the pack)


- You’ll also need 3 tbsp honey + 15ml warm water while assembling the cake


Let’s start: 

- Step 1: baking the cakes: 

I found it easier to bake one cake at the time, so be patient haha.
  1. Preheat your oven on 160°C and get your baking tin (Ø 21 cm) ready by greasing it with butter and dusting it with flour and line the bottom with parchment paper.
  2. In a bowl, sift together the dry ingredients: flour, baking powder and whisk to combine.
  3. In the bowl of an electric mixer fitted with the whisk attachment, beat the eggs and sugar together on high speed until it triples the volume and you get a white fluffy mixture. 
  4. Transfer the eggs’ mixture into another bowl (because to be honest it’s easier to rinse a plastic bowl than the big one each time). Then, add the dry ingredients and gently fold them together with a spatula, until well combined and no lumps remain.
  5. Add a good amount of food coloring to the batter and mix it in gently. You want your batter to have a nice bright color.
  6. Pour the batter in the tin and gently tap it few times on the table (be careful, don’t overdo it!). 
  7. Bake the cake for about 20 min, until it is firm and when a toothpick or a knife is inserted into the centre of the cake, it comes out dry. 
  8. Let it aside a little bit and then get it out of the tin and let it cool completely.
  9. Repeat the previous steps 5 more times using the other colors. 


- Step 2: preparing the frosting:

Pour the milk on the Chantilly cream powder and whipped it on high speed until it gets firm and fluffy (This recipe requires a lot of cream, so if your bowl isn’t big enough, you can whip it on batches). Place it in the fridge until ready to use.


- Step 3: The fun part: assembling and decorating the cake: 
  • So, now that your cakes cooled completely, they’re ready to be assembled. But first you need to trim them. If they are a little domed, slice off the excess of sponge and create a flat surface using a sharp serrated knife or a cake lever. You also have to trim the sides to remove the crusty outer shell which doesn’t look so bright. You need to make sure that your cakes have the same height and diameter. You’re going to end up with a lot of crumbs, keep it aside for decoration later.

  • Spread a bit of the cream in the centre of your serving plate and then place the purple cake (it will help the cake to stick better to the plate). 
  • Mix the honey with the warm water, drizzle some on the cake and let it soak a bit (you’ll repeat this for each layer).
  • Then put a good amount of cream and spread it evenly to the edges. Then, place the blue cake, lightly press it to help it stick better to the previous layer and put it in the freezer for about 10 min, you don’t want the cream to melt and the cake to fall apart while you’re decorating it.
  • Repeat those steps until all your layers are done: green, yellow, orange and finally red (sing the rainbow song to help you remember the cakes’ order haha).


  • After that, use a bit of cream to cover the cake with a fine coat of cream -known as the crumb coat : it helps to lock the crumbs of the cakes to get a nice neat look in the end- and let it chill in the freezer for about an hour.
  • Spread the rest of the frosting on the sides and top of the cake and smooth it until you get a nice uniform coat.
  • Finally, sprinkle it with the crumbs you kept earlier and let it in the fridge until you’re ready to serve it.


Thank you for stopping by and I really hope you'll give this recipe a try!

Bon Appétit