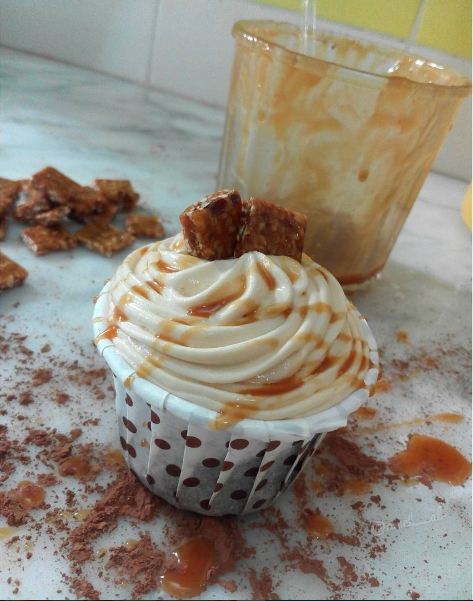
Sunday, 25 September 2016

Chocolate Chips Muffins


Hiii! Today we’re making chocolate chips muffins. They’re so simple and easy to make, you don’t even need to use an electric mixer, and yet so delicious. They’re great for breakfast or as snack anytime during the day. So let’s get cooking!


You’ll need: (for about 12 muffins)
  • 400g Flour
  • 10g Baking Powder
  • A pinch Of Salt
  • 2 Eggs
  • 150g Sugar
  • 1 tsp Vanilla Extract
  • 80g Butter
  • 150ml Milk
  • Dark Chocolate Chips


Let’s start:

  1. Preheat your oven to 180°C and line your baking tray/ muffins tin with paper cases.
  2. In a bowl, sift together the dry ingredients: flour, baking powder and salt, and whisk to combine.
  3. With a whisk beat the eggs, sugar and vanilla extract until well combined, then add the dry ingredients and mix well with a spatula, after that add the milk and melted butter and mix well until no lumps remain ((be careful not to over-mix the batter)) and finally stir in as much as you want chocolate chips: the more the better.
  4. Pour the batter in the muffin cases (about 2/3 full) and bake them for about 15-20 min until golden, firm and when a toothpick is inserted into the centre of the muffins, it comes out dry.
  5. Let them sit for a while and then transfer to a cooling rack and let them cool completely.   


Thank you for stopping by and I really hope you'll give this recipe a try!

Bon Appétit


Sunday, 18 September 2016

Basic Cheesecake


Heey… What’s up guys!

Today we’re making a Basic Cheesecake. Cheesecake is one of my favorite desserts ever! I just love its smooth and rich texture and its endless flavors’ possibilities. I topped this cheesecake with Salted Caramel Sauce but I have to apologize because I couldn’t include its recipe this time, but I promise you that I’ll make an entire post about it. Anyway, what are we waiting for? Let’s get cooking!


You'll need:
  • 200g Biscuits
  • 80g Butter
  • 4 Eggs (separate the yolks from the whites)
  • 500g Ricotta Cheese (the smooth kind)
  • 100g Powdered Sugar
  • 25cl Sour Cream
  • 1tsp Vanilla Extract
  • A Pinch Of Salt


Let’s Start:
  1. Preheat your oven to 150°C and cover the bottom of a spring-form pan with parchment paper.
  2. In a food processor pulse the biscuits until they turn into fine crumbs then melt the butter and add it to the crumbs and mix them well. Press the mixture into the pan, make sure it’s evenly distributed (( I use the back of a spoon at first and at the end I press it more with the bottom of a glass)) and then put it in the freezer until you prepare the filling.
  3. In a bowl of an electric mixer fitted with the whisk attachment, beat the egg whites with the salt on high speed; half way through, add half of the sugar and keep mixing until soft peaks form and then transfer the mixture into a different bowl gently ((it’s better to start with the egg whites mixture because if you mixed the other part of the filling first you’d have to wash and dry the bowl and the whisk before beating the egg whites and honestly it’s annoying that way)).
  4. Now, pour the ricotta in the mixer’s bowl and whip it until creamy, then gradually add the sour cream, egg yolks, vanilla extract and the other half of the sugar and combine until smooth and creamy.
  5. Gently fold the whipped whites into the ricotta mixture, and then pour it on the crust and shake the pan a little bit.
  6. Bake the cheesecake for 45min to an hour until firm and golden ((It will rise and crack a bit then fall when you get it out and that’s completely normal)).
  7. Take your cheesecake out of the oven and let it sit for a while then run a knife around the edges and release the spring-form ring, let it cool for about 30min and then refrigerate at least 8 hours or overnight 


You can eat your cheesecake just like that, or you could top it with caramel sauce and nuts like I did in the pictures shown here, some berries sauce, chocolate ganache, … be creative! 


Thank you for stopping by and I really hope you'll give this recipe a try!


Bon Appétit

Saturday, 3 September 2016

Oreo Chocolate Cupcakes


Heeeey!
Today we’re making Cupcakes. They’re not any regular cupcakes, they’re Oreo Cupcakes! Well, basically, they’re chocolate cupcakes topped with Oreo flavored cream cheese. Anyway, they’re so delicious and chocolaty yet simple to make. So let’s get cooking!


You’ll need:

  - For the cupcakes:
(It would make about 24 cupcakes)
  • 180ml Milk
  • 150g Chocolate
  • 150g Butter
  • 200g Sugar
  • 3 Eggs
  • 350g Flour
  • 50g Cocoa Powder
  • 10g Baking Powder
  • ¼ tsp Baking Soda
  • ¼ tsp Salt
  • Some cookies crushed into chunks (optional) 

  - For the cream cheese frosting:
  • 2 packs of Chantilly cream (dream whip kind)
  • 180ml cold milk (I reduced the amount of milk mentioned on the pack) 
  • 240g cream cheese
  • 1 tbsp powdered sugar
  • 8 cookies finely crushed 


Let’s start:

 The Cupcakes:

  1. Preheat your oven on 180°C and put the cupcake liners on a baking tray.
  2. Chop the chocolate and put it in a bowl, heat the milk and bring it almost to a boil, then pour it on the chocolate. Let it sit for about a minute and then stir it until all the chocolate is melted.
  3. In a bowl, sift together the dry ingredients: flour, cocoa powder, baking powder, baking soda and salt, and whisk to combine.
  4. In a bowl of an electric mixer fitted with the paddle attachment, combine the butter and sugar on until it gets light and creamy and then add the eggs one at a time mixing well in between each.
  5. Gradually add the dry ingredients alternating with the chocolate and don’t forget to scrap the sides of the bowl so everything is nicely incorporated.
  6. Fill the cupcake liners with batter to the half and you can put some cookies chunks inside if you want. Then bake them for about 15min until when a toothpick is inserted into the centre of the cupcake, it comes out dry.
  7. Let them cool completely before frosting them.


The frosting:
  1. Whip the Chantilly cream on high speed until it gets firm and fluffy.
  2. In another bowl, add the sugar to the cream cheese, and beat it until smooth.
  3. Gently mix both of the creams together, then stir in the cookies crumbs and mix until it’s nicely incorporated (you can add a bit more sugar if you think it’s not sweet enough).
((Let your frosting chill in the fridge until you’re ready to use it))


The decoration:

  • Fill a pastry bag, fitted with a star nozzle, with the cream cheese and pipe it on the cupcakes. You can add some cookies crumbs on the top or put a cookie on the top of each cupcake or even both. 


Thank you for stopping by and I really hope you'll give this recipe a try!

Bon Appétit


Saturday, 13 August 2016

Classic Chocolate Chips Cookies


Helloo! 

Today we’re making Classic Chocolate Chips Cookies. They’re a perfect treat for everyone anytime and they’re so easy to make. Plus they’re super delicious whether you bake them or you just eat the cookie dough ((though it’s not recommended to eat raw dough because of the eggs, but a little bit won’t do any harm)). So let’s get cooking!


You’ll need:
  • 300g Flour
  • 100g Sugar
  • 100g Unsalted Butter at room temperature
  • 10g Baking Powder
  • ¼ tsp Baking Soda
  • 1tsp Vanilla Extract 
  • A Pinch Of Salt
  • 2 Eggs
  • Dark /and White Chocolate Chips: I like to use both


Let’s start:
  1. In a bowl, sift together the dry ingredients: flour, baking soda, baking powder and salt, and whisk to combine.
  2. In a bowl of an electric mixer fitted with the paddle attachment, combine the butter and sugar on medium speed until it gets light and creamy, add the vanilla and then the eggs one at a time, mixing well in between each.
  3. Add the dry ingredients and mix until just combined and don’t forget to scrap the sides of the bowl so everything is nicely incorporated.
  4. Stir in as much as you want chocolate chips: the more the better.
  5. Cover the dough and let it chill for about an hour. 
  6. Preheat your oven to 180°C.
  7. With a spoon, scoop some of the dough on a baking tray lined with parchment paper, keep your cookies about 3cm apart and put some more chocolate chips on the top.
  8. Bake until cookies are golden around the edges but still soft in the centre; keep an eye at the cookies’ bottom it can be easily burned. Take the cookies out of the oven, let them cool a bit on the tray, then transfer on a cooling rack and let them cool completely. 


I like my cookies big and chunky but you choose the size you like, just keep in mind that they will spread and rise a bit.


Here is a delicious idea that you could try: grab your favorite ice-cream flavor, put a scoop of ice-cream on a cookie, then place another cookie on the top, add some chocolate chips and/or sprinkles on the sides and tadaa you have a yummy Cookies Ice-cream Sandwich (If you're planning to make these from the binging, flatten your cookies a bit before baking them, they would be much easier to eat later).


So what are you waiting for? Bake some cookies and let everyone (or just yourself..because why not? haha) enjoy this tasty snack!


Thank you for stopping by and I really hope you'll give this recipe a try!

Bon Appétit


Friday, 5 August 2016

Red Velvet Cake


Hii there!
Today we're making Red Velvet Cake. The Red Velvet is one of the world’s most popular flavors; it’s a bit chocolaty, very vanillary, slightly salty but also sweet: it’s a bit of everything and it's incredibly delicious! 

Though, I have to admit that it took me few tries to get the perfect recipe and I’m glad to share it with you, so let’s get cooking!


You'll need:

  - For the cake:
  • 300g flour
  • 2 tbsp cocoa powder
  • 1 tsp baking soda
  • ½ tsp salt
  • 100g butter
  • 300g sugar
  • 2 eggs
  • 240ml vegetable oil
  • 240ml buttermilk
  • 1 tsp white vinegar 
  • 2 tsp vanilla extract
  • Red food coloring (use gel or liquid for better results)
  - For the cream cheese frosting:
  • 2 packs of Chantilly cream (the cream whip kind)
  • 180ml cold milk (I reduced the amount of milk mentioned on the pack) 
  • 240g cream cheese
  • 2 tbsp powdered sugar


Let’s start: 

   The cake:

1) Preheat your oven on 180°C  and get your baking tins ready by greasing them with butter and dusting them with flour.

2) In a bowl, sift together the dry ingridents: flour, cocoa powder, baking soda and salt, and whisk to combine.

3) In a mixer, mix the butter and sugar together until well combined, then add the eggs one at a time, mixing well in between each, keep mixing until it becomes creamy.

4) Add the oil, vinegar, vanilla extract and buttermilk one at a time and mix well in between each.

5) Gently and gradually, add the dry ingredients and don’t forget to scrap the sides of the bowl so everything is nicely incorporated.

6) Finally, add a good amount of red food coloring to the batter and mix it in gently. You want your batter to have a nice bright red color.

7) Divide your batter equally into your tins and gently tap it on the table.

8) Bake it for about 20min, until it is firm and when a toothpick or a knife is inserted into the centre of the cake, it comes out dry. 

9) Let it cool on a side a little bit and then get it out of the tin and let it cool completely.


   The frosting: 

1) Whip the Chantilly cream on high speed until it gets firm and fluffy.

2) In another bowl, add the sugar to the cream cheese, and beat it until smooth.

3) Gently mix both of the creams together and let your frosting chill in the fridge until you’re ready to use it (you can add a bit more sugar if you think it’s not sweet enough)


   The decoration:


If your cakes are a little domed, it’s okay, with a sharp knife slice off the excess of sponge to create a flat surface and keep it aside for decoration later.
Spread a bit of the cream in the centre of your serving plate and then place your cake, it will help it stick better to the plate. Then put a generous amount of cream cheese and spread it evenly to the edges. Then, place the second cake, lightly press it to help it stick better to the previous layer and put it in the freezer for about 10-15min, you don’t want the cream to melt and the cake to fall apart while you’re decorating it. Repeat this step until all your layers are done. After that, use the excess of cream that oozed when you assembled the layers to cover the cake with a fine coat of cream (known as The crumb coat : it helps to lock the crumbs of the cakes to get a nice neat look in the end) and let chill in the freezer for about an hour. Spread the rest of the frosting on the sides and top of the cake and smooth it until you get a nice uniform coat. Finally, decorate it with the crumbs you kept earlier and let it in the fridge until you’re ready to serve it.


P.S: for these measures, you can use two 18 cm tins to bake two little but quite thick cakes. In the pictures shown here, I used this recipe twice to bake 4 thin 23cm cakes so I can get a big layer cake because there was so many of us.


Thank you for stopping by and I really hope you'll give this recipe a try!

Bon Appétit

Monday, 25 July 2016

An Introduction to My Euphoric Kitchen


Hi there!

My name is Amel and I'm 21 years old. I'm an amateur home baker and I made this blog to share my recipes with you.
Well..I can't remember when did I exactly start baking but I remember that I've always enjoyed watching mom baking when I was a little girl, and it helped learn a lot of things about baking. I am not a professional baker yet, but I'm aiming to be one someday. In fact my journey has just began. I still have so much to learn, recipes to try and many skills to master.
Sharing the food that I make is one of my favourite things. I love that glow on someone's face when they taste something delicious and especially when I'm the one who makes it. As I love to share, I'd like you to join me and support me through this journey. I have no idea how this blogging thing is going to be nor how regular my posts will be but I'm hoping it will be fun and I'll get to post weekly.
To be honest my writing skills aren't that great, so without further ado, I hope you find this blog useful and worth following, and most of all, I want to thank the lovely and amazing Sarah Laajimi who helped me make this blog idea come true, and for that I'm so grateful!
Thank you for your time and see you soon!